While we try to teach our children all about life, our children teach us what life is all about.
~Angela Schwindt


Thursday, July 28, 2011

Science Club number 3- Flying Things

The theme this week was Flying Things.


I encouraged the kids to think about what makes things fly.
When building rockets and planes, what can they add to make their designs fly farther, faster, or straighter ?
I asked them to play with fin design and material, rocket length and other adaptations.
... but, mostly we just got caught up in the fun!

Our activities...


getting ready the night before...
all the activities in different bins! Helpful!
 1. Elastic "Fling" airplanes. They take about 30 seconds to make.


http://alittlelearningfortwo.blogspot.com/2010/10/elastic-aeroplanes.html
Wrap the folded paper around the elastic, pull back, and ZOOOOOOOM!


2. Loop Airplanes.
/http://www.instructables.com/id/The-Two-Loop---Paper-Airplane/


3. Straw Rockets.

Wrap paper around straw and tape. (Don't tape to the straw).  Fold over top and secure with tape. Add fins. Blow through the straw!


4. Straw and balloon rockets
1. Put straw through string, tie string to 2 posts.
2. Blow up balloon but don't tie it (keep pinching it!)
3. Tape balloon to straw (one strip to underside of straw works well)
4. Let go of balloon and watch it zoom!

How did we end up with 15 blonde kids?
I absolutely love the stairs as a teaching spot!

Lukey- wants to be teaching like his mama.


5. Marshmallow poppers. Again, so easy and so fun!
1. Cut bottom out of cup (but leave bottom ring intact or cup will lose its shape).
2. Cut top off balloon and tie a knot in the... the... part where you usually tie the knot :)
3. Open balloon where you cut it and stretch it over the bottom of the cup. Secure with masking tape.
4. Put a marshmallow or other object in the cup, pull on the knotted part (see above) and BOOM!

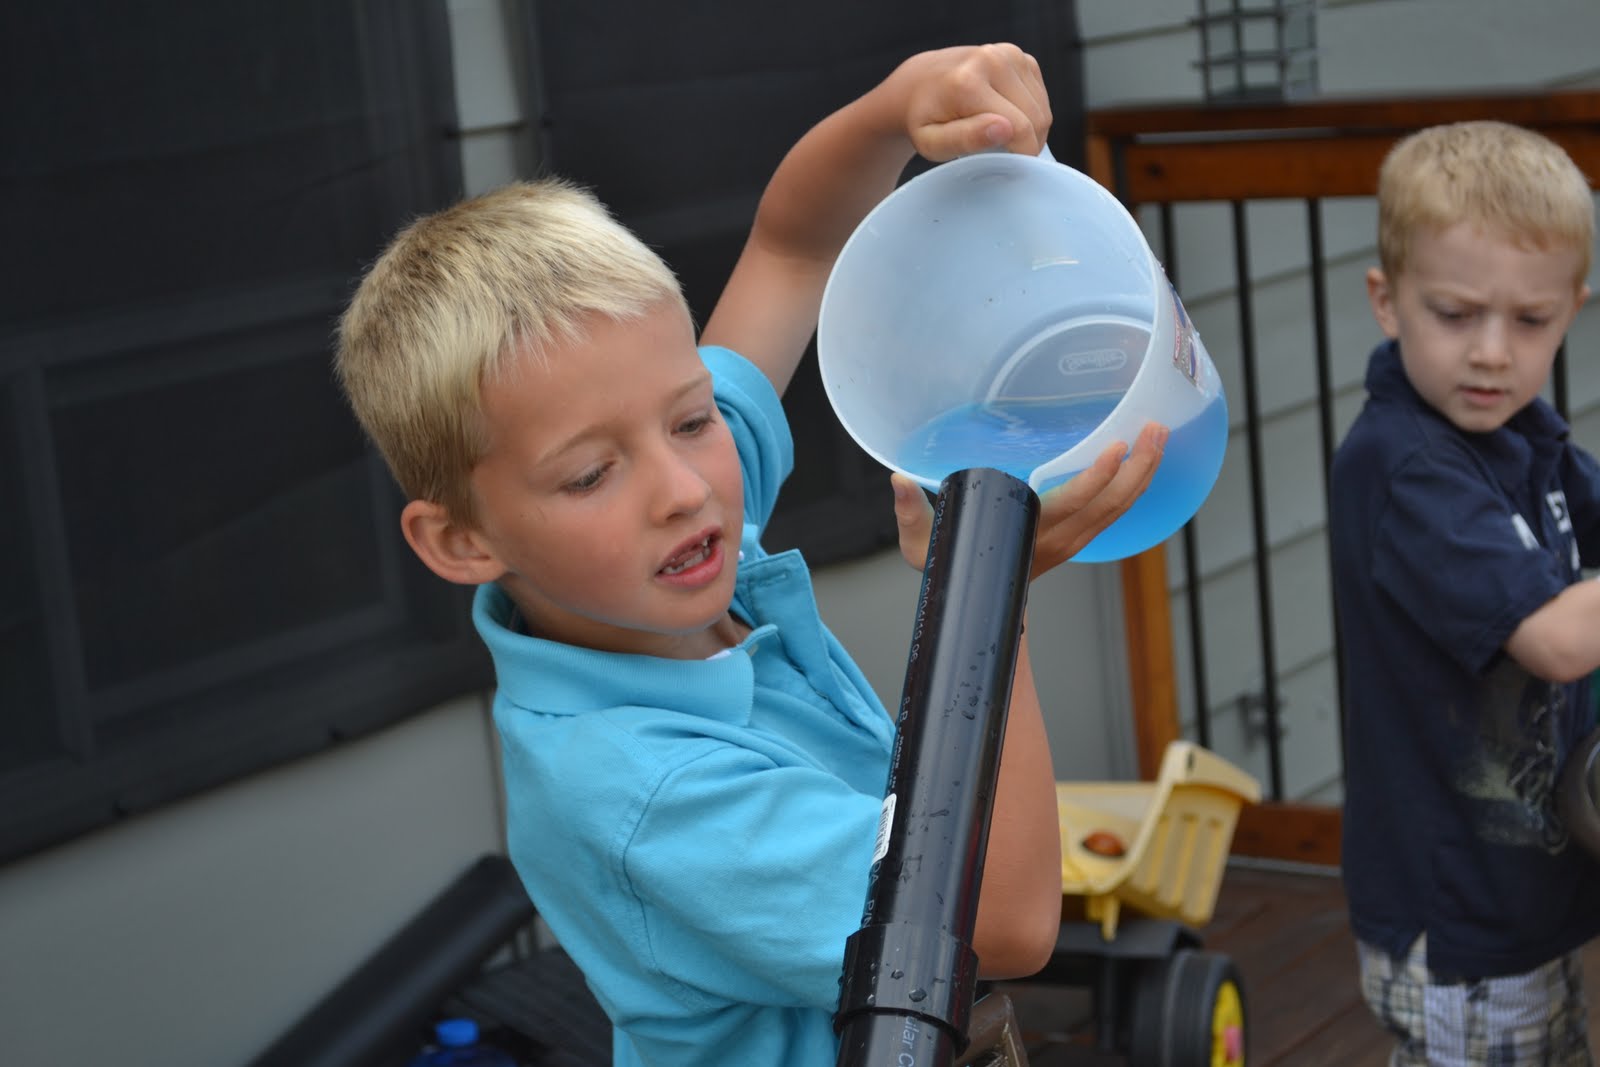
6. Alka Seltzer Rockets. Am I allowed to say it again... ? So easy and so fun!

 1. Go to your local film processing place and ask for some clear film canisters. They have to be the ones that seal completely with the top fitting inside the canister. (They will look at you, smile, and say, "Alka Seltzer is in Aisle 8.")
2. Build a tube around the canister and tape it to the canister (but don't let any hang over where the lid snaps in). The canister part is the bottom of your rocket.

3. Making the cone: draw a circle, make a cut from  the edge to the middle. 

Fold one piece over the other. Ta-da! Attach it to the top of your rocket. 


4. Next, add fins for stabilizing. Experiment with size, shape and materials. Decorate if you like!

5. Put an Alka Seltzer tablet in the canister (or half- it still works) and fill 1/2 way with water. Quickly snap on the top and stand up your rocket.
Wait for it... 
POP!

Some hints for building the rockets via Julie...

1. Short tube works best for getting height. (less weight)
2. Wrap a few more pieces of tape around the bottom to keep the water from ruining your rocket.
3. Re-use your Alka Seltzer a few times.


My friend Julie:
"Okay, you have to take a picture of your table, because
it looks like some serious science happened here!"
7. I also found these at our local dollar store...


You blow up the balloon and let 'em fly!

Monday, July 25, 2011

Science Club number 2- Candy Experiments

One of the first things we learn in teacher training is to try out your lessons before you do them. I somehow got lazy and thought I'd just wing it... and almost all of our candy experiments bombed. Nevertheless, the kids had a great time and made sure they sampled everything we tried!!!
Nice shirt... fitting!!!
Every idea I got was from www.candyexperiments.com
Super cool website- and the thing I like most is their spirit of experimentation. They never cease to ask "What if..." or "What can I do with this?" Some great lessons by just looking at the thinking behind their experiments. Nice.

Probably the most simplistic, yet effective experiment was testing different candy to see if it would sink or float. They had to predict first too. Almost everything sank, but we had lots of interesting discussion. Pop rocks let off bubbles. Some tiny sprinkle shapes sank or floated, depending on how they were put in the bowl.
We tried some individually wrapped Werther's candies still in the package, which floated, but sank once we unwrapped them. Hmmmm....


Recording results on the Sink or Float T-chart


testing pop rocks

Dissolving M&M's and Skittles... the printed M's and S's actually
peel off and float to the top. Didn't work every time, but if you
try it enough times, you may get a letter intact.

Epic Fail #1: Skittles Density Rainbow.  Dissolve 2 red, 4 orange, 6 yellow etc.
(more skittles= more sugar/density)
Cool idea, just didn't separate them properly. Ended up with browny-purple sludge.
this is the beautiful example I was trying to make

Epic Fail #2: How did the Coke and Mentos thing not work???
Too small of bottle, not enough in the bottle...? 

Cold water currents - Ice on one side of the dish in room temp. water.
Pushed the wateraway from the ice (colours just show the currents).
Very interesting AND pretty!


Epic Fail #3: M&M chromatography (colour separation).
I tried my own version but not so exciting. Whatever!

Making our own gummy candies from a kit. Bit of a sell-out but I needed a WIN!
All in all, it was super fun and the kids learned some great lessons. I learned mine too!!!!

Wednesday, July 13, 2011

School Lunches

It was a real challenge to figure out what to send with Owen for school lunches. He was only 4, and was about to be doing full day kindergarten! He is a very picky eater and I worried about what I could pack in his lunch that he would eat!
I revised an idea I stole from Martha Stewart, back when she had a kids' magazine. It was the BEST. Most of the ideas are on her website, but it's just not the same. Okay, I'm getting off topic here...


I made a chart for the fridge with colour-coded pockets.

Orange is the MAIN thing (sandwich, muffin, cheese and crackers, bagel and cream cheese...)

Green is FRUIT and VEGETABLES

Yellow is a SNACK (apple sauce, rice cakes, fish crackers, fruit leather, yogurt...)

Blue is a TREAT (cookies, granola bar ...) 


I cut and pasted images (Google images) of his favourite foods (or at least those I knew he'd eat), printed them and glued them to the corresponding colour of cardstock.

In the morning, or night before, Owen chooses which foods he would like to have and puts them in the pockets. I was afraid he would choose the same thing every time, but amazingly, he chose a variety of options. 
If I didn't have a certain food, I didn't put that card out. I also encouraged him to try and add foods to the list over the year, especially in the fruit and veg category. He's slowly coming around.


I hope this helps your lunch-making!

Science Club number 1


Science and Art- two of my biggest passions. So I decided to hold a club, once a week for some friends of my kids. (It helps that a few of their moms are teachers too, so we had lots of help!)
Today's theme was building challenges. Scientists have to constantly revise their work and keep trying new ideas or solutions. I stressed perseverance with the kids- if it doesn't work the first time, that's great because you can find a new way. I encouraged them to think like a scientist and ask, "what if I do this...?" or "what will happen if I...?".


Thomas Edison: "Results? Why, man, I have gotten lots of results! If I find 10,000 ways something won't work, I haven't failed."


I set up 5 stations, divided up the 10 or so kids (ages 3-9) into groups of 3 or 4. My 2 year old joined in too!


Station 1. Marbleworks. 
(One of my favourite toys).
 Their challenge was to try to build a pathway that keeps the marble going for at least 30 seconds. I find if they have a goal to work toward, it definitely encourages them to keep going and focuses their efforts.

This was at the end when a bunch of the kids came back to Marbleworks...
the sight of this made me grin from ear to ear!

Station 2: Drinking straw inventions. 
With the help of some really neat connectors I found at a science museum gift shop ("FUN STRAWS"), the kids could make creative and tasty inventions.
This one had straws in 2 different flavours of juice!

Station 3: Pipes
We have a collection of plastic pipe from Home Depot, cut into various sizes, and a bunch of 1/4 and 1/2 "elbows" and round connectors. The kids had to make a pathway for the water that went down the stairs and into the bucket below. Blue water made it just that much more interesting!


My 2 year old getting right in there!


Station 4: Frigits
Frigits are like Marbleworks, but it is 2 dimensional and all about trial and error. Kids from age 2- 15 that have come to our house are captivated by it. These 3 were working on using all the pieces, including the swinging ones, which are really tough!


Station 5: Marble Painting
It seemed to go well with our marble theme. Put a piece of paper in a box or bucket, dip marbles in paint, and tip the box to make designs. They all really enjoyed it!


One of the best parts of the day was that when the kids were getting dropped off (about 12 in total), the hydro company knocked on the door and told us they were shutting off the power for 2 hours. In reality, it was almost 3 hours.
WE DIDN"T EVEN NOTICE!!!
Stay tuned for our next week's club!


Thursday, July 7, 2011

Salmon Life Cycle Song

I was recently asked what my most creative accomplishment was...
This was my response.
Click on this YouTube link...

I Will Survive (Parody)- The Life Cycle of a Pacific Salmon


Hope you enjoy!

Here is a link to an mp3 version of it (music only)
https://www.box.com/s/sw1ozr36g0f7q1fjaqlv